Profile & Preferences
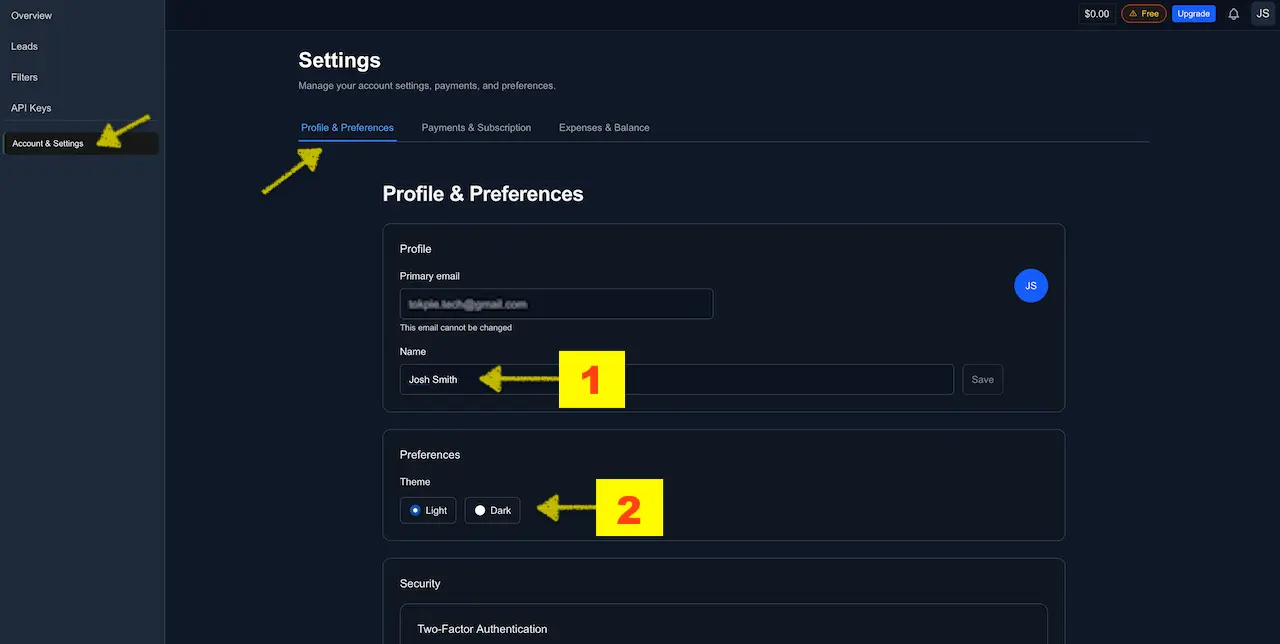
Use the Profile & Preferences page to keep your account details current and secure. Here you can update your Name, switch Theme (Light/Dark), enable Two‑Factor Authentication (2FA), change password, log out, and set billing details for your invoices.

1) Update your name
Enter the Name you want displayed and click Save. Your avatar initials update accordingly (e.g., John Smith → JS).
Your Primary email is fixed and can’t be changed from this page. Your original username used for sign‑in also remains the same.
2) Switch theme (Light/Dark)
Toggle the theme by selecting Light or Dark. The preference applies immediately across the app.
3) Enable 2FA (recommended)
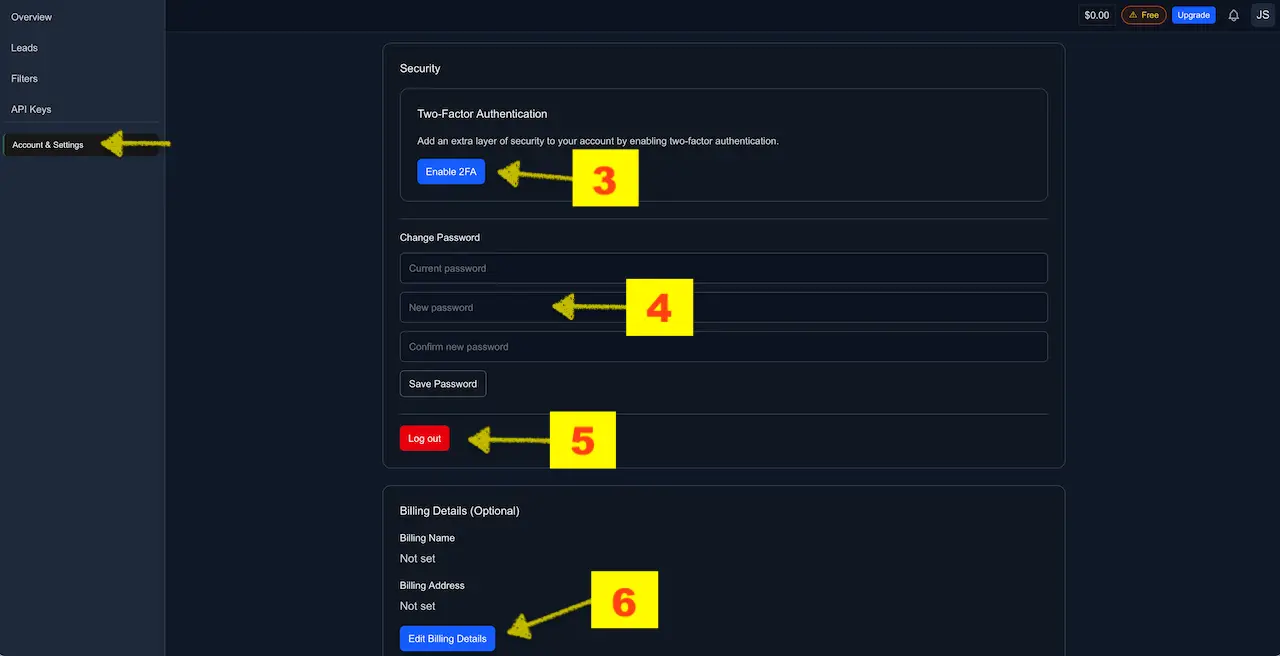
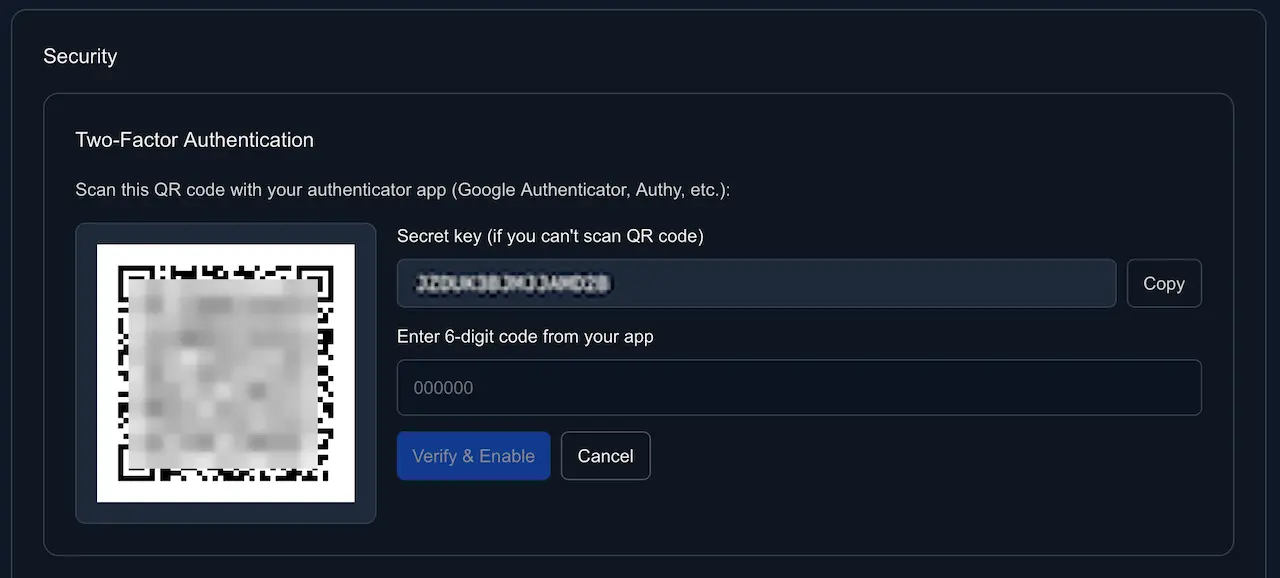
Add an extra layer of security by enabling Two‑Factor Authentication. So, to enable 2FA, Click Enable 2FA in Security.

Scan QR or use the secret key
In the modal, scan the QR code with an authenticator app (Google Authenticator, Authy, etc.). If you can’t scan, use the Secret key shown below the QR. Then, enter the 6‑digit code from your app and click Verify & Enable.The 2FA dialog includes both methods so you can enroll on desktop or mobile.
Store the secret safely—if you lose your authenticator device, you’ll need this key to re‑add the account.

Treat the secret key like a password. Anyone with it can generate valid 2FA codes for your account.
4) Change your password
To update your password:
- Enter your Current password.
- Enter a New password and Confirm new password.
- Click Save Password, then follow the confirmation email to finalize the change (check Spam/Promotions if needed).
5) Log out
Click the red Log out button to sign out of the app on the current device.
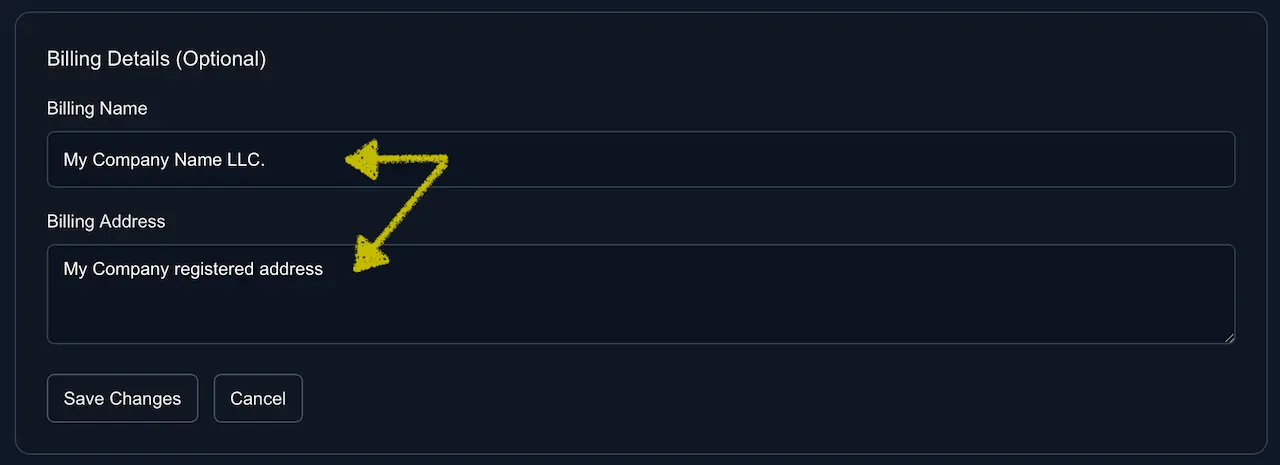
6) Billing details (company name & address)
To enter/update your company name and business address, open profile, scroll down and click Edit Billing Details button. As a result, you will be able to add or change the Billing Name and Billing Address used on your invoices/receipts. This is optional but might be helpful for your bookkeeping.

- What it affects: the header on every Invoice/Receipt PDF you download in Settings → Payments. See Payments & Subscription and Invoices & Receipts for details.
- What it doesn’t affect: your login email/username or how leads are delivered.
First‑day checklist
- Set your Name and Theme.
- Enable 2FA to protect your account.
- Save your billing details so invoice PDFs show your company info.
- Change your password if you used a temporary one.
Common states & what to do
- Authenticator code not accepted → Ensure your device time is set to Automatic and try another fresh code. Re‑scan the QR if needed.
- Lost access to authenticator → Use the stored secret key to re‑enroll the app, or contact support to reset 2FA after identity verification.
- Didn’t receive the password email → Check Spam/Promotions, then request again. Whitelist our domain if messages are throttled.
- Invoice shows missing company info → Add Billing Name and Billing Address, then re‑download the PDF from Settings → Payments.
Power tips
- Use a reputable authenticator app and back up your 2FA secrets securely.
- Keep account metadata tidy: name the profile with the entity that appears on your invoices.
- Combine this page with Payments & Subscription to manage invoices and balance without leaving Settings.
- Open Profile & Preferences: https://dashboard.leadgencrypto.com/settings/profile