Leads
The Leads page lists projects delivered to your account (newest first). Each row includes Website, Token address (copy icon / external link), Blockchain, Token symbol/name, and verified Email(s) / Telegram. Use Export → CSV to download what you see. You can also pull the same data programmatically via the Public API to connect your CRM or other tools.
Free vs Paid
Both plans deliver verified token‑project leads—the difference is cadence and volume. The Free plan lets you claim one manual lead every 24 hours (ideal for testing). The Paid plan delivers leads automatically at your chosen daily quota (2–1,000/day) with Pause/Resume controls. Both plans support CSV export and API access.
Free
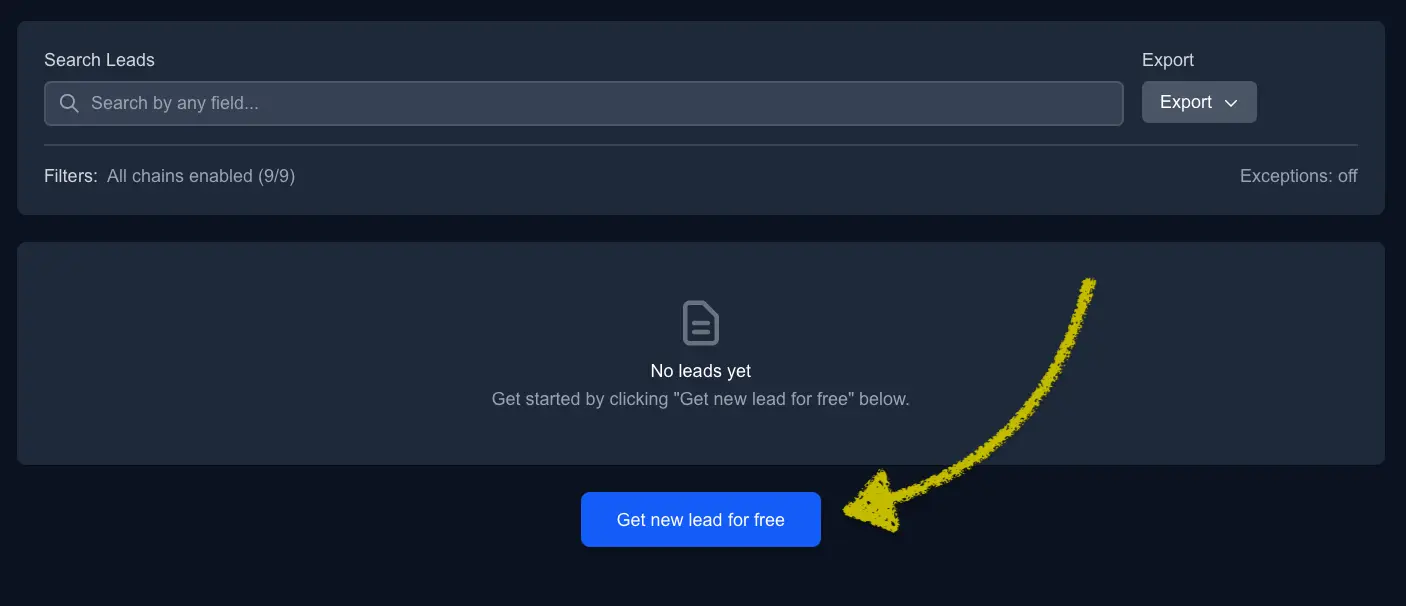
After a successful sign‑up, open the Leads page and click Get new lead for free.

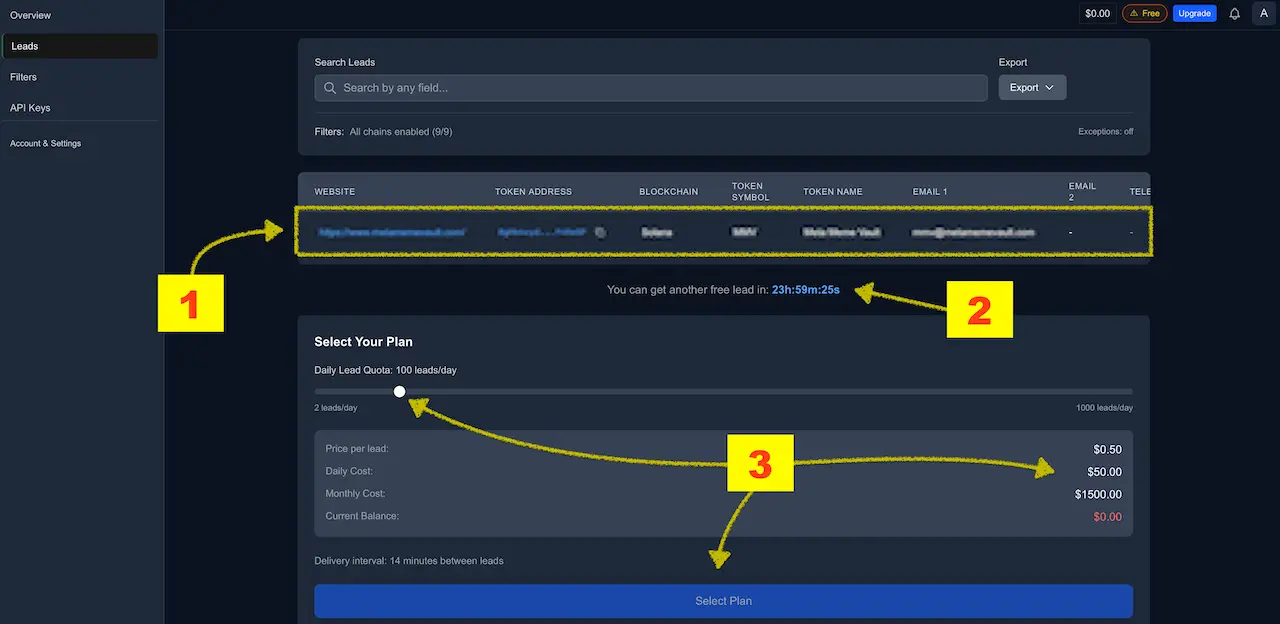
Once you click, you’ll see the page update:

1) Lead row
Your first row is the delivered lead. It includes Website, Token address, Blockchain, Token symbol/name, a verified Email (one or two), and Telegram (when present).
On the Free plan you must click Get new lead for free each time the 24‑hour window resets. To automate intake, switch to any paid plan—for example, Plan 2 (2 leads/day) for a simple, low‑cost start.
You don’t need to exclude emails or token URLs that LeadGenCrypto has already delivered to your account. We automatically avoid re‑sending the same primary email or the same token URL to the same account.
Use Exceptions when you want to skip contacts you already had from other sources (CRM, prior lists, campaigns), or to suppress whole projects/domains proactively.
Edge case: if a project later uses a different email address (or a new token URL) it may appear as new. Add those to Exceptions if you want to suppress any variant for that project.
2) 24‑hour cooldown timer
After you claim a free lead, a countdown appears showing when your next free lead is available. You can keep claiming one lead per 24‑hour window indefinitely. Note that free leads are synchronized across free accounts within the same window.
3) Plan selector
Use the Daily Lead Quota slider to set your desired volume. The panel shows Price per lead, Daily cost, and Monthly cost so you always know the spend. Click Select Plan to confirm.
Tip: starting with a small quota (e.g., 2/day) fully automates delivery—you no longer need to press the free‑lead button.
Paid
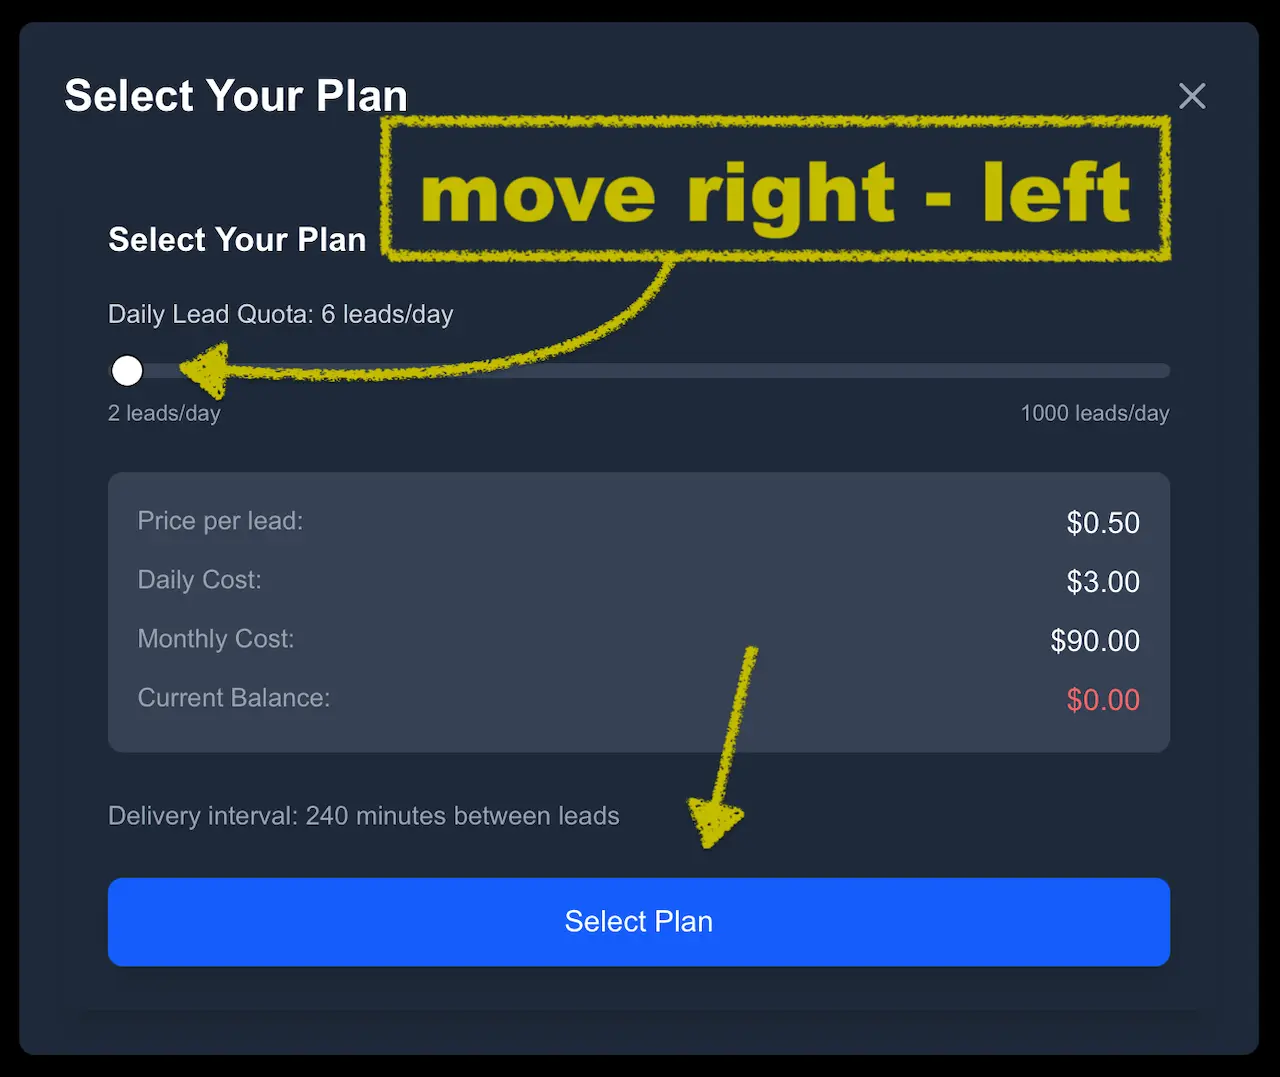
After a successful sign‑up, click Upgrade in the header to open the plan selector.
In the selector, drag the Daily Lead Quota slider left or right to choose how many leads you want per day (2–1,000/day). The panel updates Price per lead, Daily cost, Monthly cost, and the Delivery interval. Click Select Plan to confirm. If you need funds, you can top up your balance at any time.

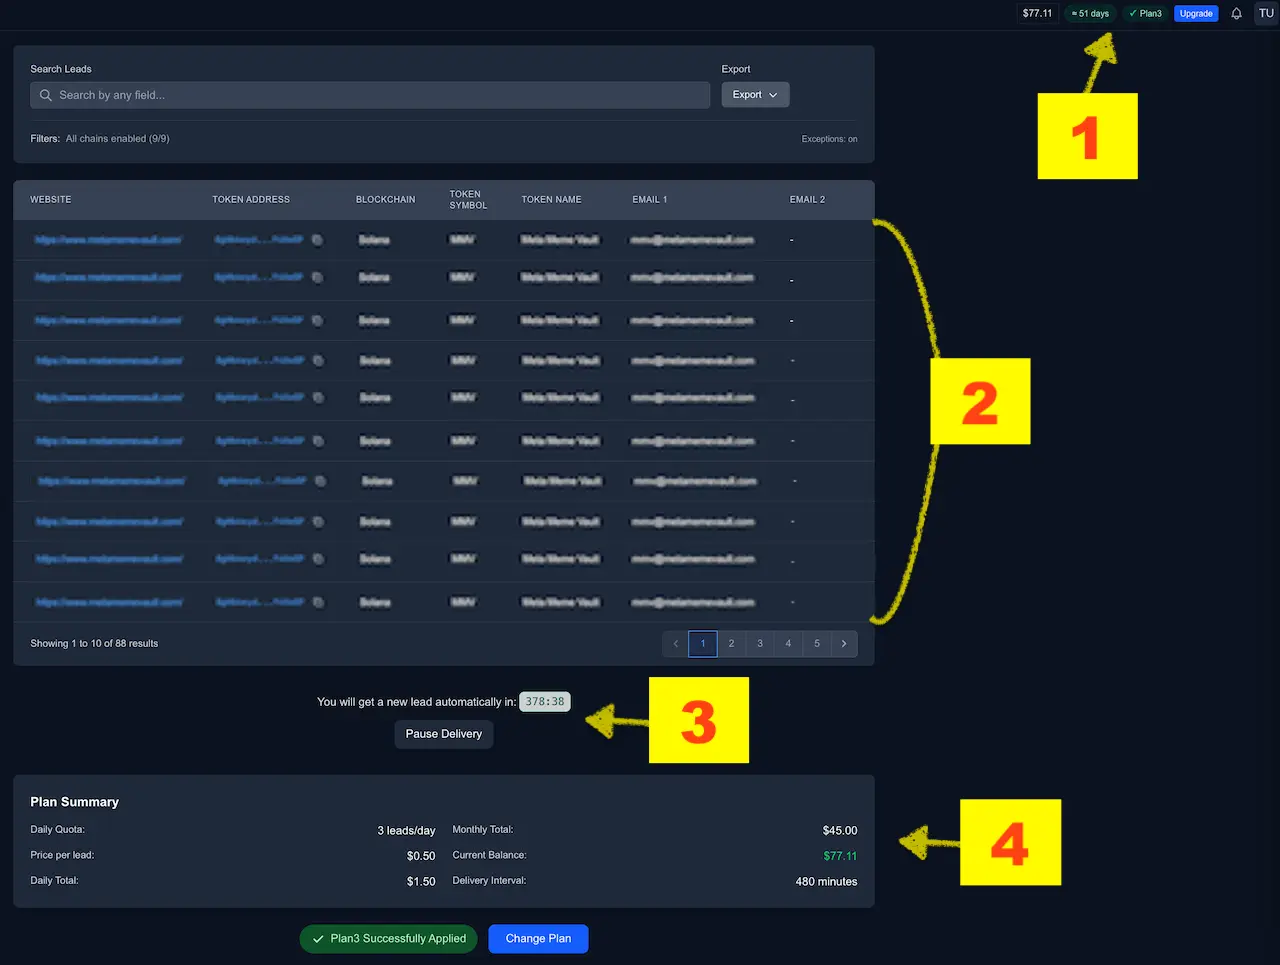
Once a paid plan is active, the Leads page shows these additions:

1) Updated header
The header displays your current balance and a days remaining indicator for the selected plan. You can change plans at any time by increasing or decreasing the daily quota.
2) Leads table
Leads are delivered to the Leads page automatically. Each row includes Website, Token address, Blockchain, Token symbol/name, verified Email(s), and Telegram (when present).
3) Countdown & Pause
A countdown shows: “You will get a new lead automatically in: HH:MM:SS”.
The delivery interval ≈ 24 h ÷ your daily quota (e.g., quota 3/day → ~8 h between leads; 24/day → ~1 h; 1000/day → roughly 1–2 min).
Use Pause Delivery / Resume to temporarily stop and restart intake; the countdown freezes while paused—useful if you need to adjust your CRM or workflows.
4) Plan Summary
This panel shows your leads/day, price per lead ($0.50), daily/monthly cost, current balance, and the delivery interval so you always know your spend and cadence.
Leads — Search & Export

1) Search
Use the Search bar to filter your delivered leads by any field (domain, email, chain, symbol, etc.). For example, type ethereum to show only projects on the Ethereum blockchain.
2) Export
Open Export and choose:
- Export to CSV — download the current view.
- Automate with API — pull the same data programmatically; see Public API.
- Export to CRM — jump to CRM‑oriented options.
Power tips
- Use Filters & Exceptions to keep relevance high and costs low.
- For integrations, call
viewRecentLeads(last 24 h) orviewLatestLeads(withlimit) via the Public API.